INFORMATION GATHERING TOOL
INTRODUCTION
- Autoscan is the networking discovery and managing application .
- The main purpose of this tool is to display the list of machines/equipments in your network .
- AutoScan is a free software .
- AutoScan is licensed under GNU Public Licensed (GPL) .
- Under GPL License you are free to use it and modify it
FEATURES
- Automatic Network Discovery.
- Fast Network Scannner .
- No priviledge account is required.
- Realtime detections of machines/equipments .
- TCP/IP Scanner .
- SNMP Scanner .
- Port Scanner.
- VNC Client .
- Telnet Client .
- Nesses Client .
- Wake On LAN Functionality.
- Automatic Detection of known Operating System .
- Intruder Detection ( in ID mode ,all machines are blacklisted).
- Save your Scan result in XML file .
HOW TO OPEN AUTOSCAN IN BACKTRACK 5 R2
- To open Autoscan , follow the path given below -
- Backtrack > Information Gathering > Network Analysis > Network Scanners > autoscan
- See the below image for more details -
AUTOSCAN LOADING
- As soon as we launch it , autoscan will load on your Backtrack 5 .
- See the below image , it shows that autoscan is loading -
- Network Wizard is open as shown in the below , now click on the Forward button -
- See the below image for more details -
CONFIGURE THE NETWORK
- In this step -
- Enter your Subnet and ip then ,
- After configure the Network ,click on the Add button .
- See the image for more details -
- After click on the OK buton , your subnet and ip is now added to the list .
- See the below image for more details -
- In this step , select the Localhost option and click on Forward Button .
- See the below image for more details -
SELECT NETWORK INTERFACE
- In this step select the Network Interface
- In my case I have selected eth0 [192.168.222.131]
- And at last click on the forward button .
- See the below image for more details -
CONFIRMATION
- In this step , it ask to confirm our settings .
- Click on the forward button .
- Below image shows that Name of the Network is Local network and interface is eth0 .
- See the below image for more details -
HERE IS THE OUTPUT
Example 1 :
- In my local network , it shows the 5 ip addresses .
- See the image for more details -
EXAMPLE 2 :
- When you select 1 ip , then it display the information as shown in the below image -
- See the below image for more details -
EXAMPLE 3 :
- When you click on the info tab ( mention in the image ) then it display all the Open TCP , UDP ports with other information .
- See the below image for more details -
EXAMPLE 4 :
EXAMPLE 5 :
- Save your file in .xml format .
- click on the Save icon and save your file in .xml format .
- See the below image for detail -
EXAMPLE 6
- Using TELNET Service on Backtrack 5 .
========================================================================
 EXAMPLE EXAMPLE
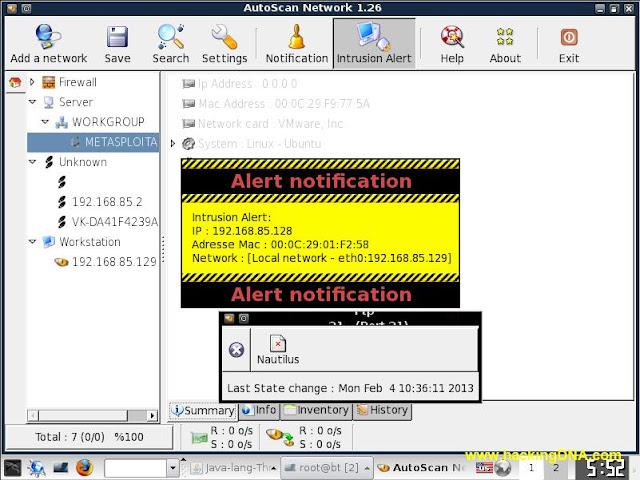
EXAMPLE 7 : INTRUSION ALERT
- Now this is a intrusion alert example.
- Below you can see the 'Alert notification'. Whenever anyone trying to access , it will shown the Intrusion alert .
- See the below image for more details -
|


 EXAMPLE

Comments